How To Configure Windows Failover Cluster using Virtual Machines
This post goes over how to configure a Windows 2012 or 2016 Failover cluster with a shared disk to run on Virtual Machines.
You will need 3 Virtual machines:
- A domain controller
- Node1
- Node2
You will need 5 IPs on the same subnet (these are just examples, use whatever you want)
- 172.168.30.100 – DC
- 172.168.30.101 – Node1
- 172.168.30.102 – Node2
- 172.168.30.103 – MsCluster
- 172.168.30.104 – MyApplication
You will need 2 IPs on a separate subnet (these will be the heartbeat IPs, you can use whatever you want)
- 10.10.10.11
- 10.10.10.12
Create Virtual 3 Machines
I am using Virtual Box to create and manage my VMs, you can use whatever you want. (If you plan on cloning them make sure you run sysprep)
Node1
Create a virtual machine with these settings:
- OS disk for Windows
- 2 network interfaces
- 1 for domain network traffic (public)
- 1 for heartbeat between Node1 and Node2 (private)
- Install Windows 2012
- Assign IPs to both Nics (determine which one will be the private one now, label that NIC ‘Heartbeat’)
- Assign DNS of the public NIC to the IP of the DC (172.168.30.100)
- Change Hostname
- Reboot
Node2
Create a virtual machine with these settings:
- OS disk for Windows
- 2 network interfaces
- 1 for domain network traffic (public)
- 1 for heartbeat between Node1 and Node2 (private)
- Install Windows 2012
- Assign IPs to both Nics (determine which one will be the private one now, label that NIC ‘Heartbeat’)
- Assign DNS of the public NIC to the IP of the DC (172.168.30.100)
- Change Hostname
- Reboot
DC
Create a virtual machine with these settings:
- OS disk for Windows
- 1 network interface for domain traffic
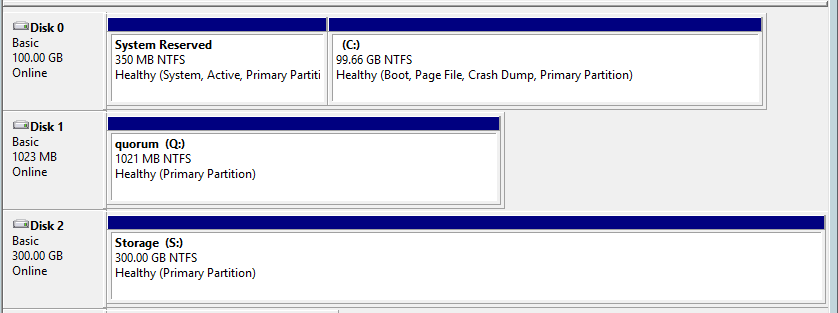
- 2 additional virtual disks
- 1 disk for shared quorum drive (1GB Dynamic)
- 1 disk for shared storage for a database, or file server, etc.. (however big you want, I am using 300GB for mine)
- Install Windows 2012
- Assign IP to Nic
- Assign DNS to 127.0.0.1
- Change Hostname
- Reboot
Configure Domain Controller
From Server Manager, go to Add Roles and Features
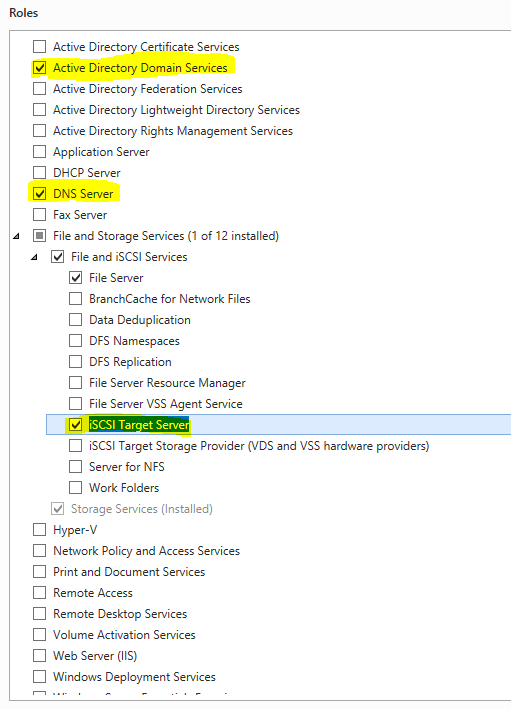
Install these Roles:
- Active Directory Domain Services
- DNS server
- iSCSI Target Server
Reboot if necessary
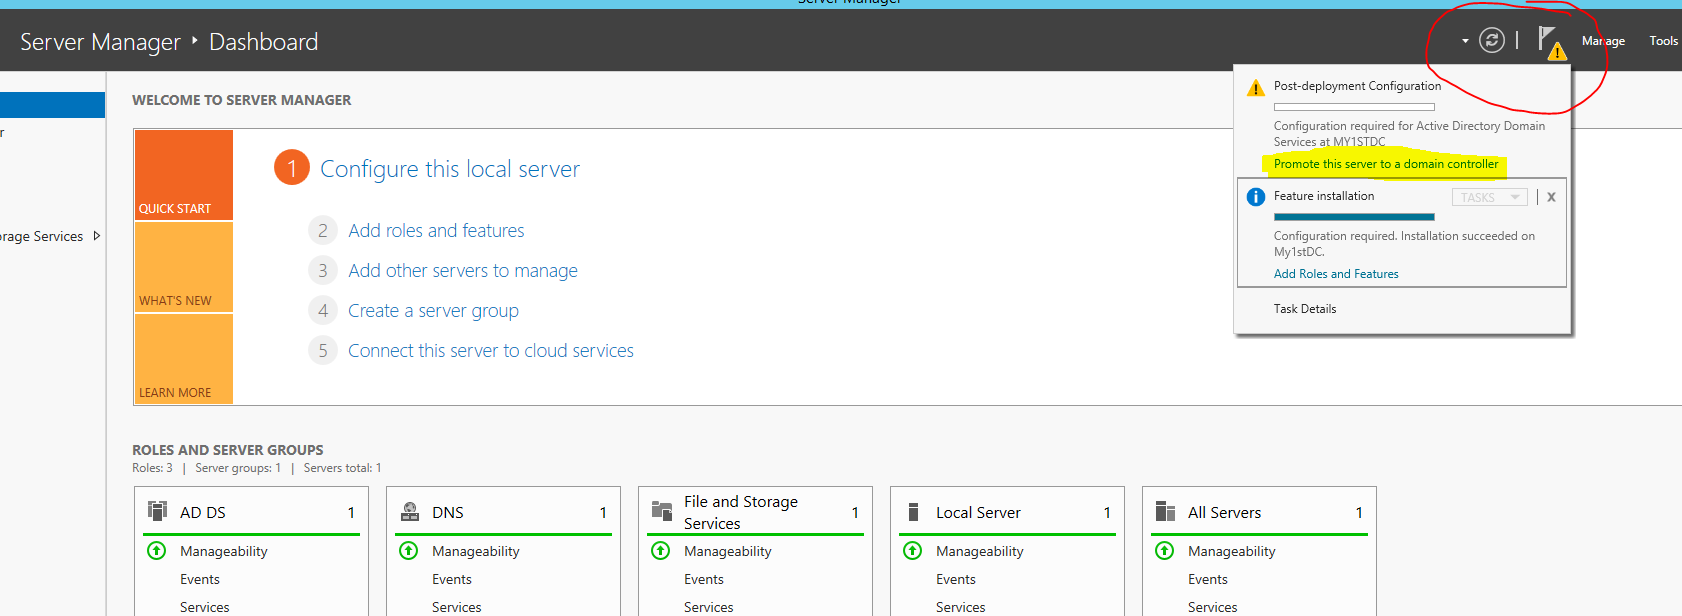
After machine comes back up, go back into server manager and finish setting up the domain. You need to promote the DC VM to a domain controller.
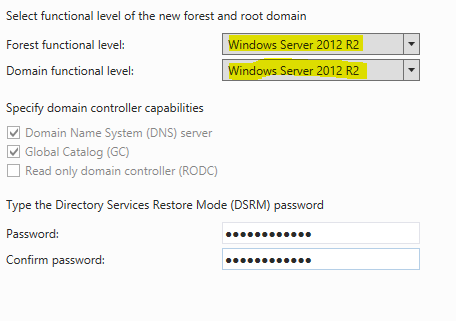
You want to create a new forest, name it whatever you want.

Leave the functional level at 2012
Skip the DNS delegation option
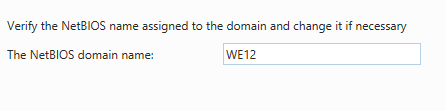
You can leave the NETBIOS name or change it to whatever you want.
Click next through the rest of the screens and accept the defaults.
Make sure all the prerequisites pass before you hit install

The Server will reboot after the install is complete. When it comes back up you will be logging into the Domain Administrator account, not the local administrator account.

Join Both nodes to the domain
Log into both nodes and join them to the Domain
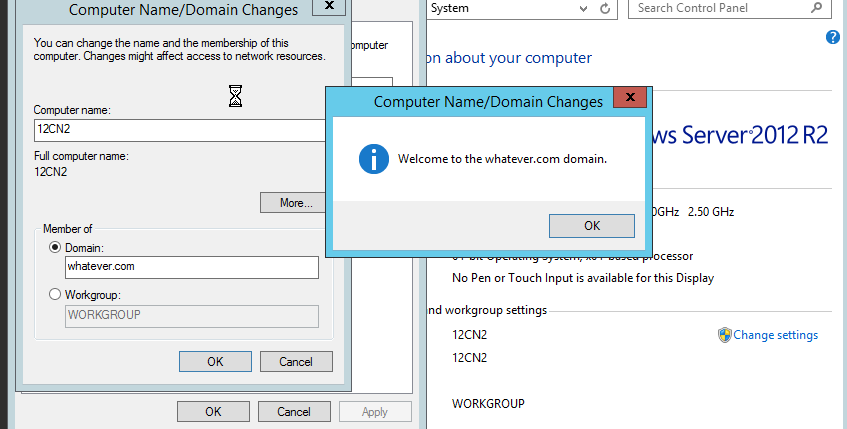
Reboot
Configure ISCSI Target
Log into the Domain Controller VM
Go to disk Management on the Domain Controller VM, make sure both of the storage disks you created are initialized and assigned a drive letter
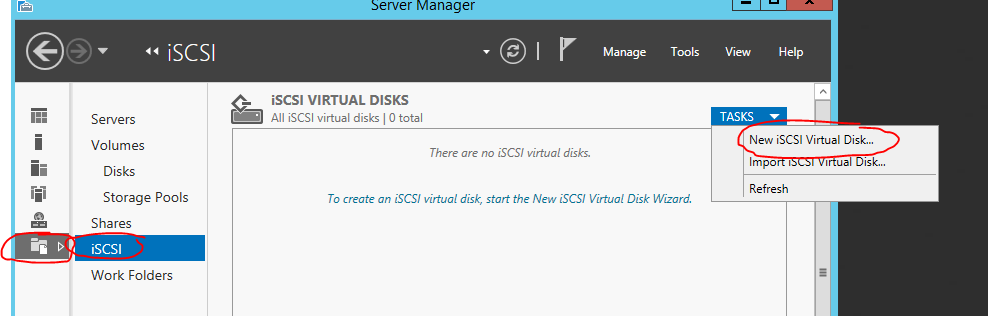
Go to Server manager > File and Storage services > iSCSI
Click Tasks > new iSCSI disk
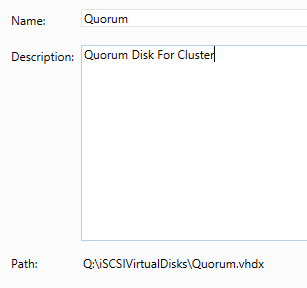
Select the Quorum Drive first

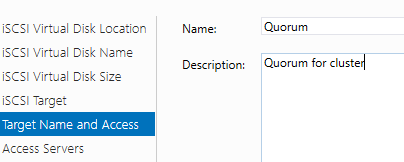
Give it a name and description, click next
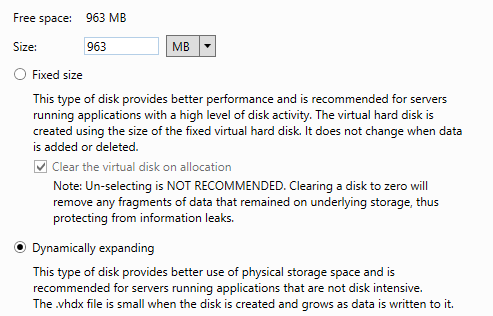
Give this disk all the available size and set to Dynamic, click next
Create a new Target, name it Quorum, click next
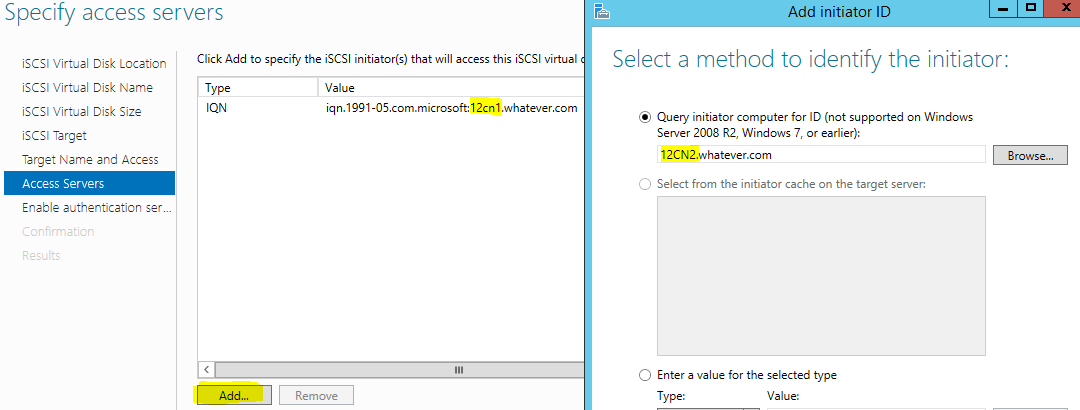
Add both nodes as access servers
Skip CHAP configuration, click next
Click Create
Repeat this section for the Storage disk, after you are done you should be sharing out two iSCSI targets.

Connect Nodes to iSCSI targets
You are going to do this section on both nodes
Login to the node as the Domain Administrator account (WE12\Administrator)
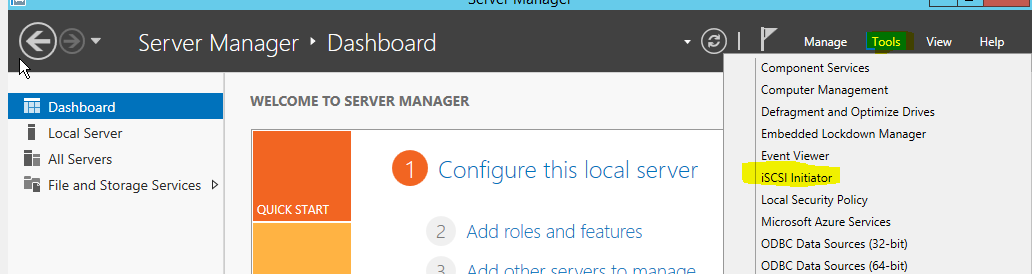
In server manager go to tools >iSCSI initiator
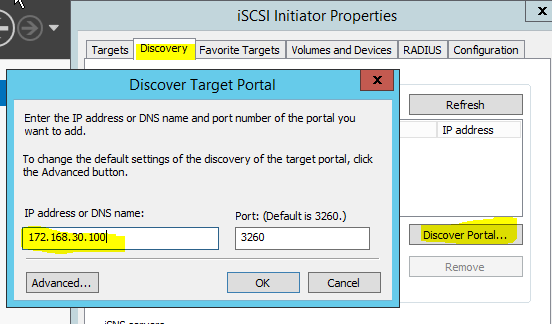
Click on the Discovery Tab
Click on the Discover Portal button
Add the IP of the Domain Controller (iSCSI target server)
Click OK
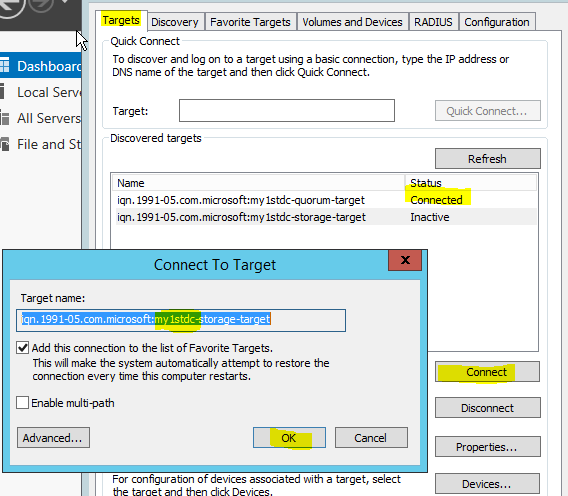
Click on the Targets tab
You will see both targets (quorum and storage)
Highlight one of them and click connect, Confirm you are connecting to the right thing and click OK on the window that pops up.
After both are connected the disks should show up in Disk management
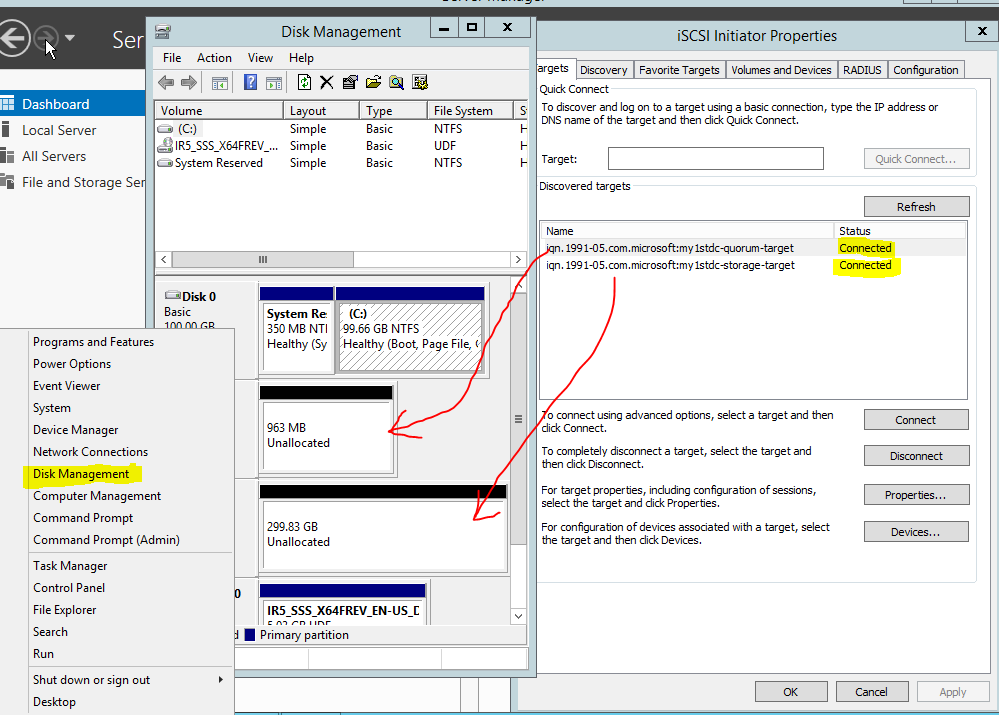
Repeat this section for both nodes
Online Shared the storage
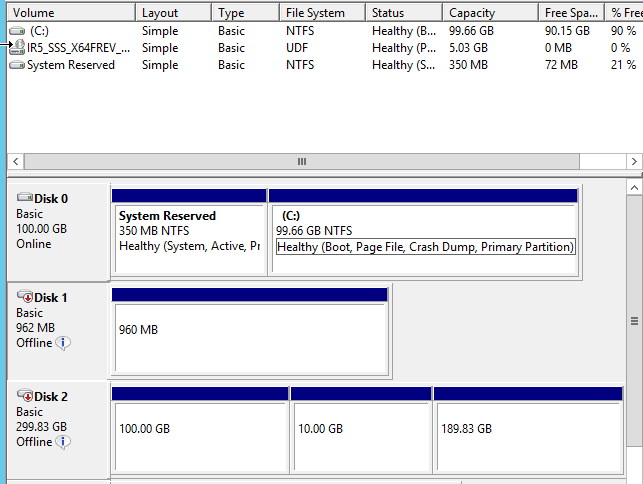
Log into Node1
Open disk management
Initialize the disk
Online the disk
Create partitions if desired
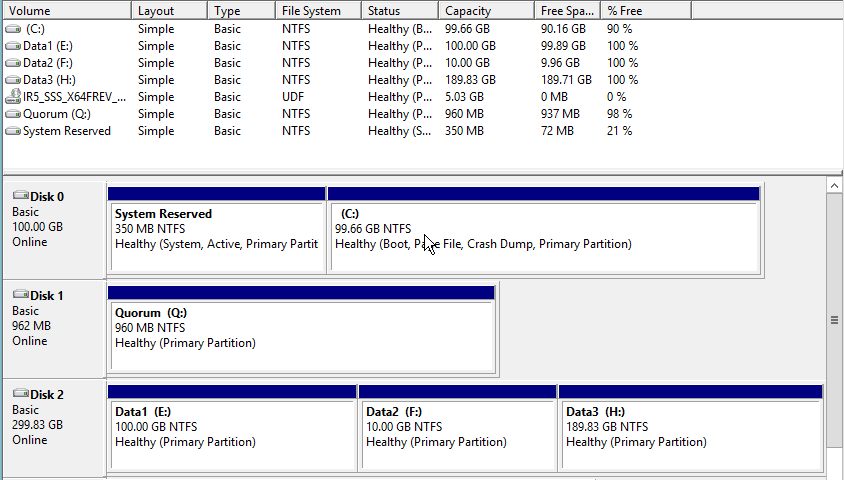
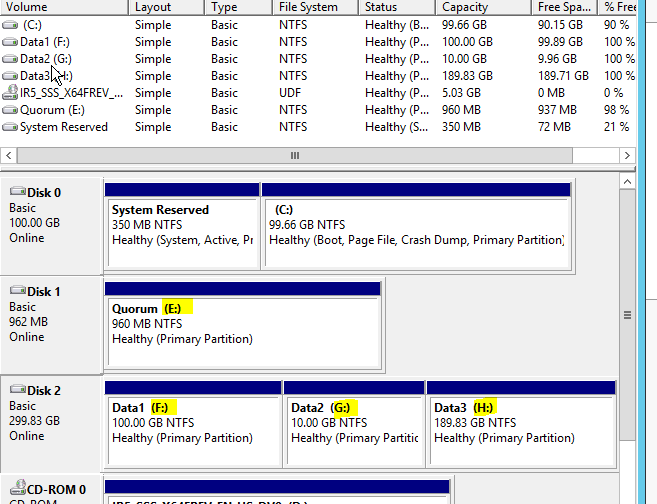
After disk shows up as normal disks on Node1, log into node2
Open disk management
You will see the disks show the partitions from node1, you just need to online the disk
Right click and online both disks
The disks will come online but all the drive letters for the partitions will be incorrect, fix each one of them individually. Make them match what you did on Node1.
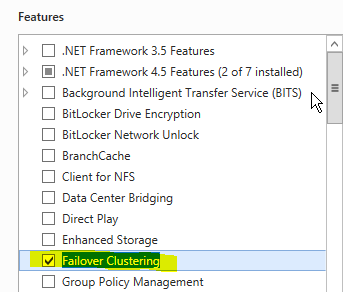
Install Failover Cluster Manager
Do this for both nodes
Go to add Roles or Features and install Failover Clustering feature on both nodes
Reboot if necessary
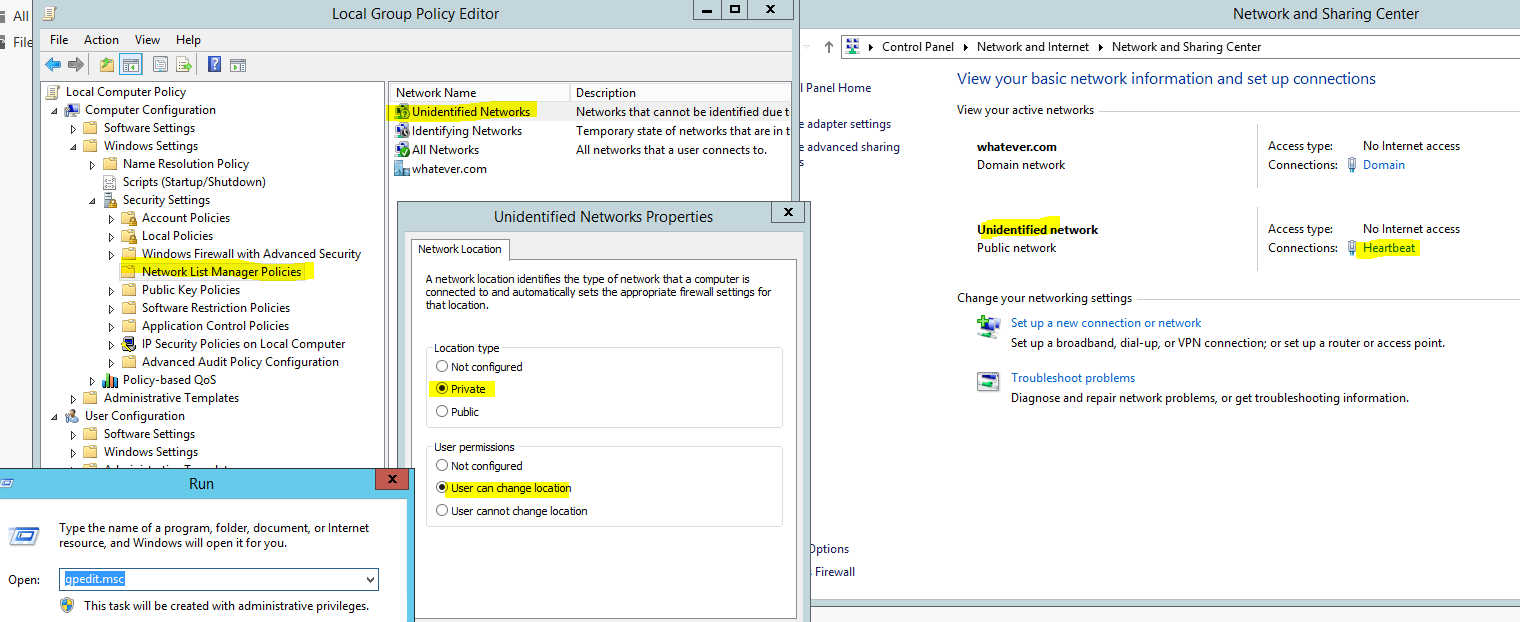
Configure heartbeat Nics
Do this section for both Nodes
Start>run>gpedit.msc
Navigate to ‘Computer Configuration/Windows Settings/Security Setting /Network List Manager Policies’
Change location type to private
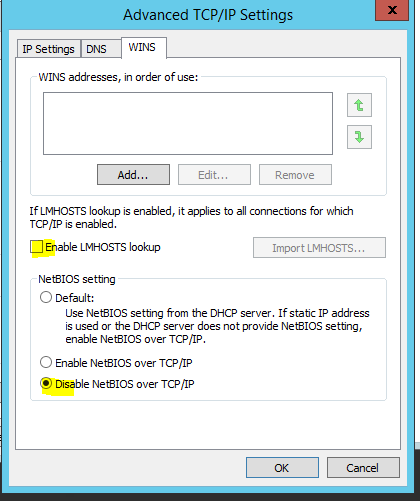
Open up the Heartbeat NIC ipv4 properties and change DNS and WINS settings from the advanced menu
Uncheck ‘Register this connection’s addresses in DNS tab
Uncheck ‘Enable LMHOSTS lookup’
Disable NetBIOS over TCP/IP

Create Microsoft Cluster
Log into Node1 as the domain administrator account

Open Failover Cluster Manager (administrative tools > Failover Cluster Manager)
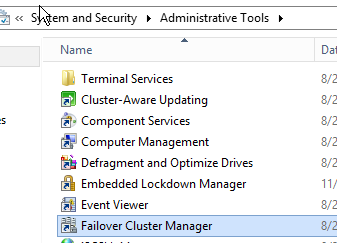
I usually pin this to the taskbar so it is easier to access, once you start adding services to the cluster you will want to start and stop them with this interface, not services.msc
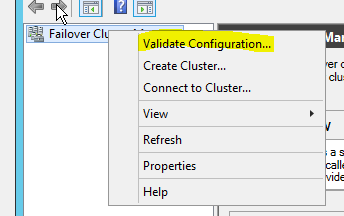
After Failover Cluster Manager opens you will want to Validate your environment, this checks network and storage settings.
Right click Failover Cluster Manager in the left Frame and select Validate configuration
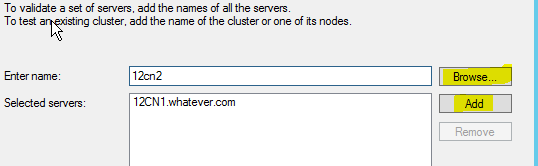
Add both nodes to the cluster by entering their DNS names you gave them earlier, click browse and it will find the Full name for that object in AD.
Add them both to the list of selected servers and click next
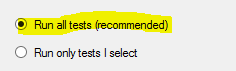
Run all the tests, click next
After the testing is done you will see if the environment is suitable for clustering. It may have some warnings, some of them may not be a big deal. Click on view report to confirm. Try to resolve as much as possible.
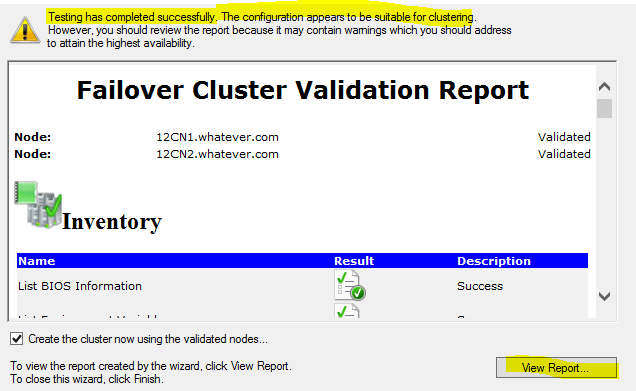
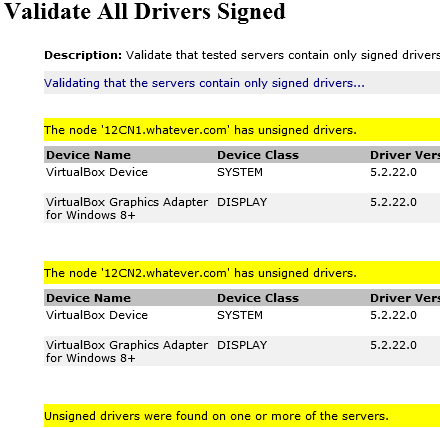
Mine is complaining about unsigned drivers. This is from Virtual box guest additions. I am going to ignore it and continue with my cluster creation.
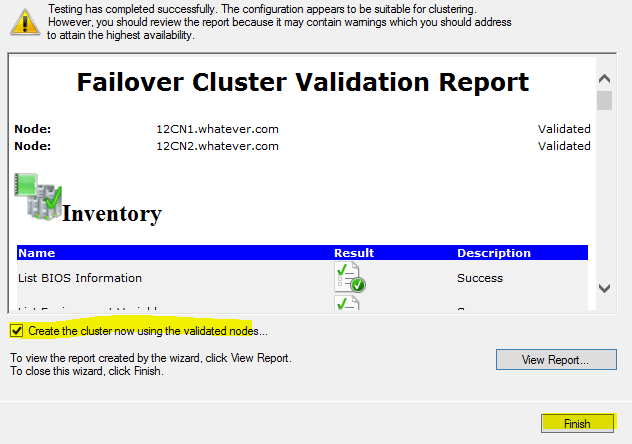
You can continue creating the cluster from this Validation Wizard.
Check the ‘Create cluster now’ box and hit finish
After hitting finish the Cluster Creation wizard will pop up
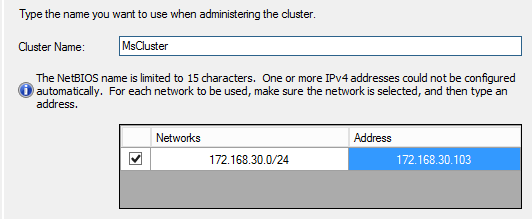
Create a name for your Mircrosoft Cluster (this is not the application cluster)
Enter the IP you had planned for your Microsoft cluster
Hit next
On the summary page, check the box to ‘Add all Eligible storage’ and click next
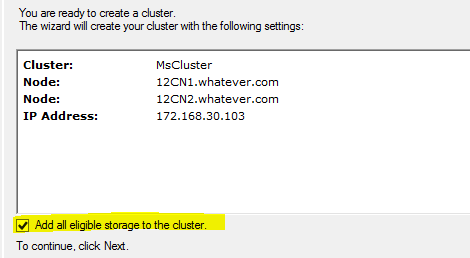
The Microsoft cluster will be created. Click finish
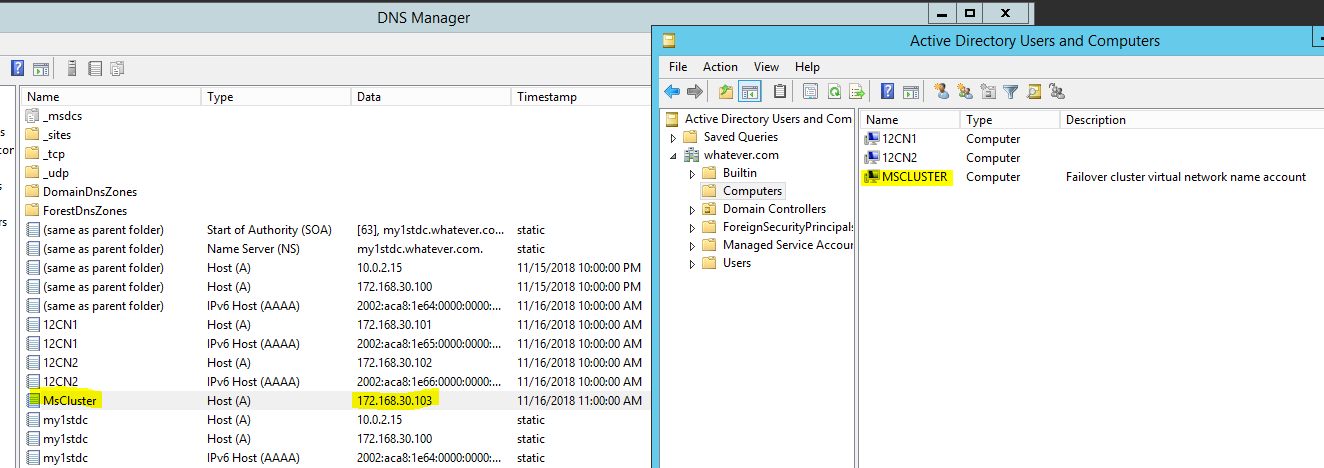
This creates a new Computer Object in Active Directory.
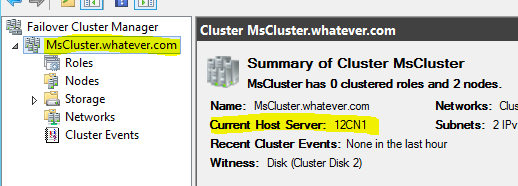
Your failover Cluster Manager now shows you a cluster to connect to.
Hilight your cluster name and you can see which server is currently hosting the Microsoft cluster.
Create a Cluster Role
A cluster role is a list of resources that run together.
You can create a role by right clicking Roles and selecing ‘Create Empty Role’

You can assign an Access point to this role by right clicking the role and selecting ‘Add Resource’ > ‘Client Access Point’
This allows you to assign an IP and a DNS name to this Role.

This opens up a New Resource Wizard.
You can assign your Application a Name and an IP
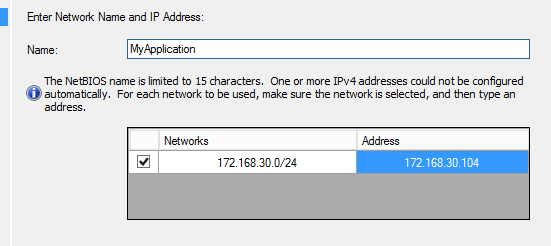
Click next through the wizard after picking the name and IP.
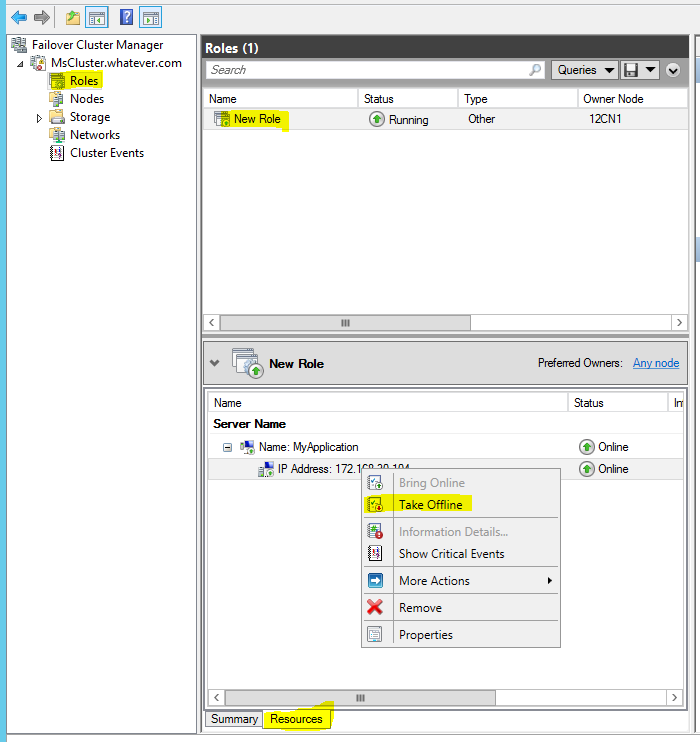
It will create some resources that are part of the Role
You can take them offline and online by right clicking them
You can add windows services the same way
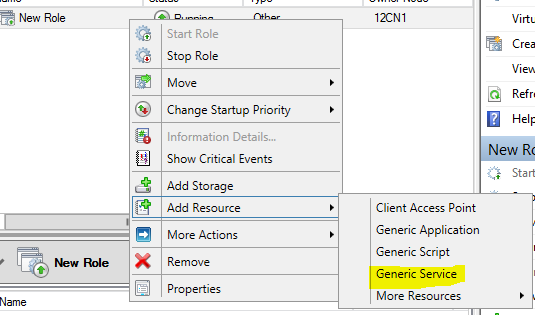
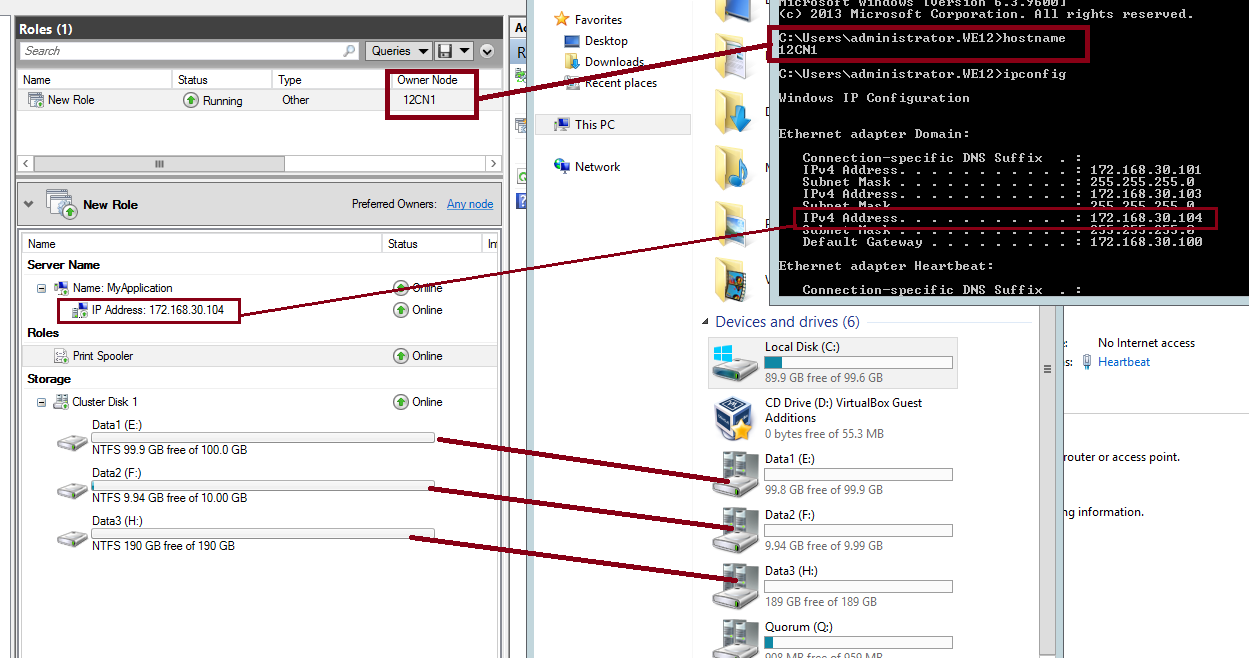
I added this print spooler service to my role.
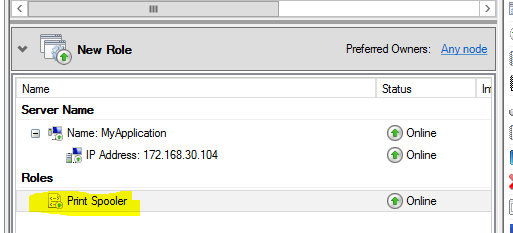
This 172.168.30.104 IP will now follow the print spooler service to whatever Node is hosting the Role.
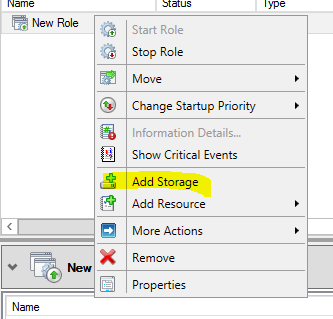
You can also add storage to the role
Managing a cluster role
You can tell which node is hosting the Role by looking at the current owner
Here is a look at node1, it is currently the owner of the role
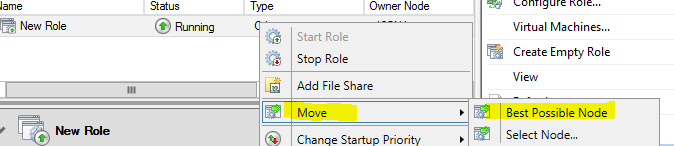
You can change the owner of a role and core resources indecently by right clicking and telling the Role to move to another node.
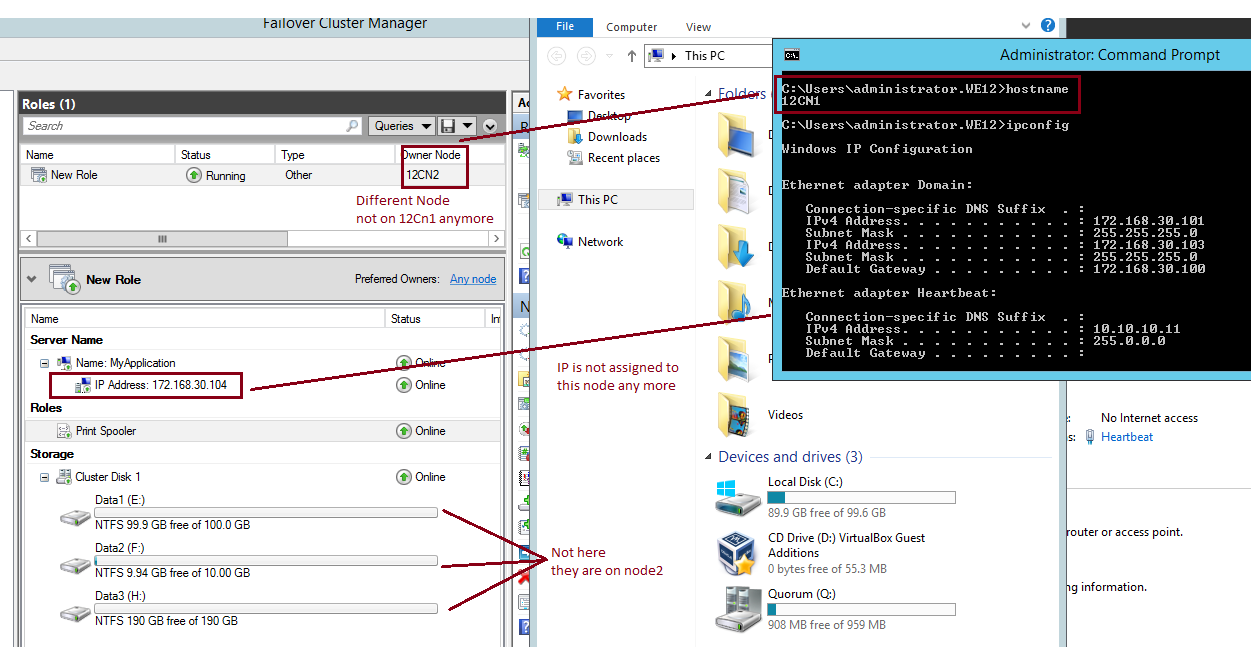
After moving the role you can see that all the resources that were running on Node1, have not been moved to node2
Here is another look at node1 after moving the role to node2.
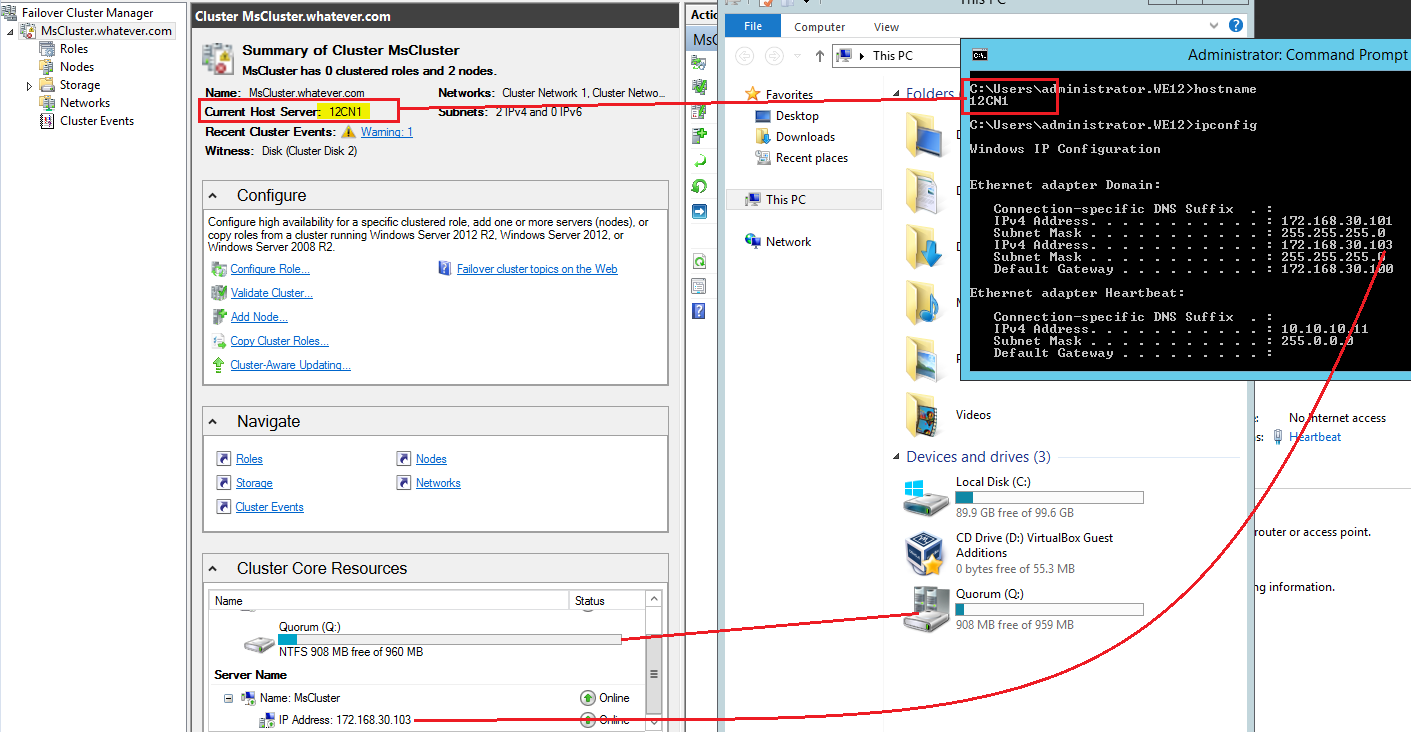
Managing Cluster Core Resources
You can change the owner of the Mircrosoft Cluster as well
Here is a look at Node1, it is currently the one hosting the MsCluster.
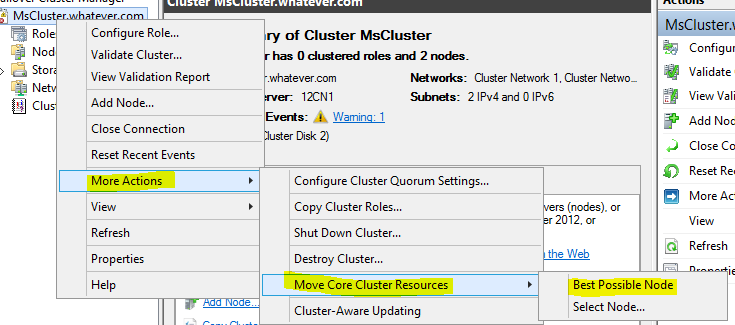
You can move the core resources to node by right clicking the cluster and selecting ‘More Actions’ >’Move Core Cluster Resources’
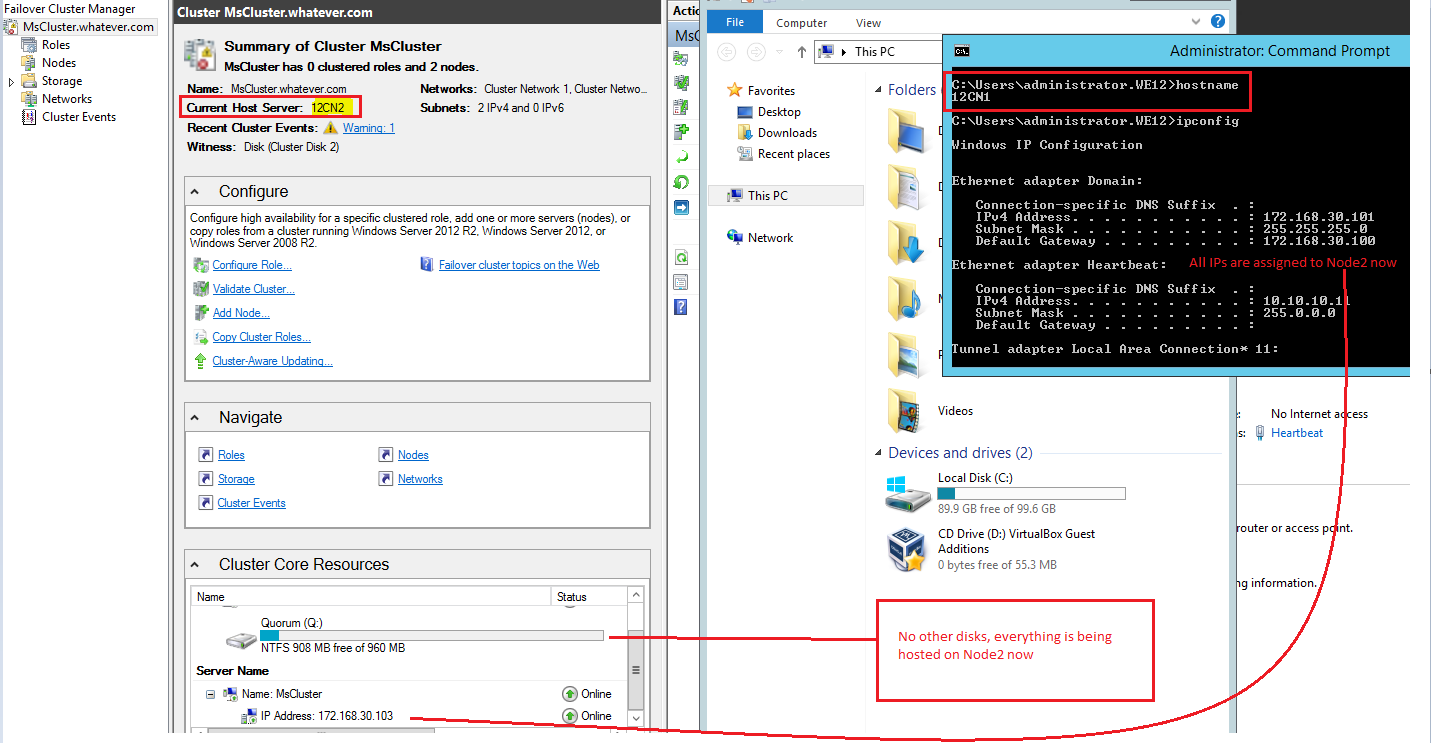
Here is another look at node1 after moving core resources to node2
Thanks for this detailed walk-through. Exactly what I was looking for.
Great! Glad it was helpful
This doc helped me grown my hair back!
But in all seriousness this was awesome, thanks for the straight forward instruction!!
Woot woot! Thanks Dayne!